
Pardot Form Handlers: Seamless Data Integration Tutorial
The Pardot form handler allows you to use your forms to post your data to Pardot. A Form handler is the best alternative to use instead of Pardot iFrame forms. You can fully customize the look of your form and submit data to more than one database. In this tutorial, you will learn how to create a form handler from scratch.
Create a new form handler in Pardot:
Step1:-
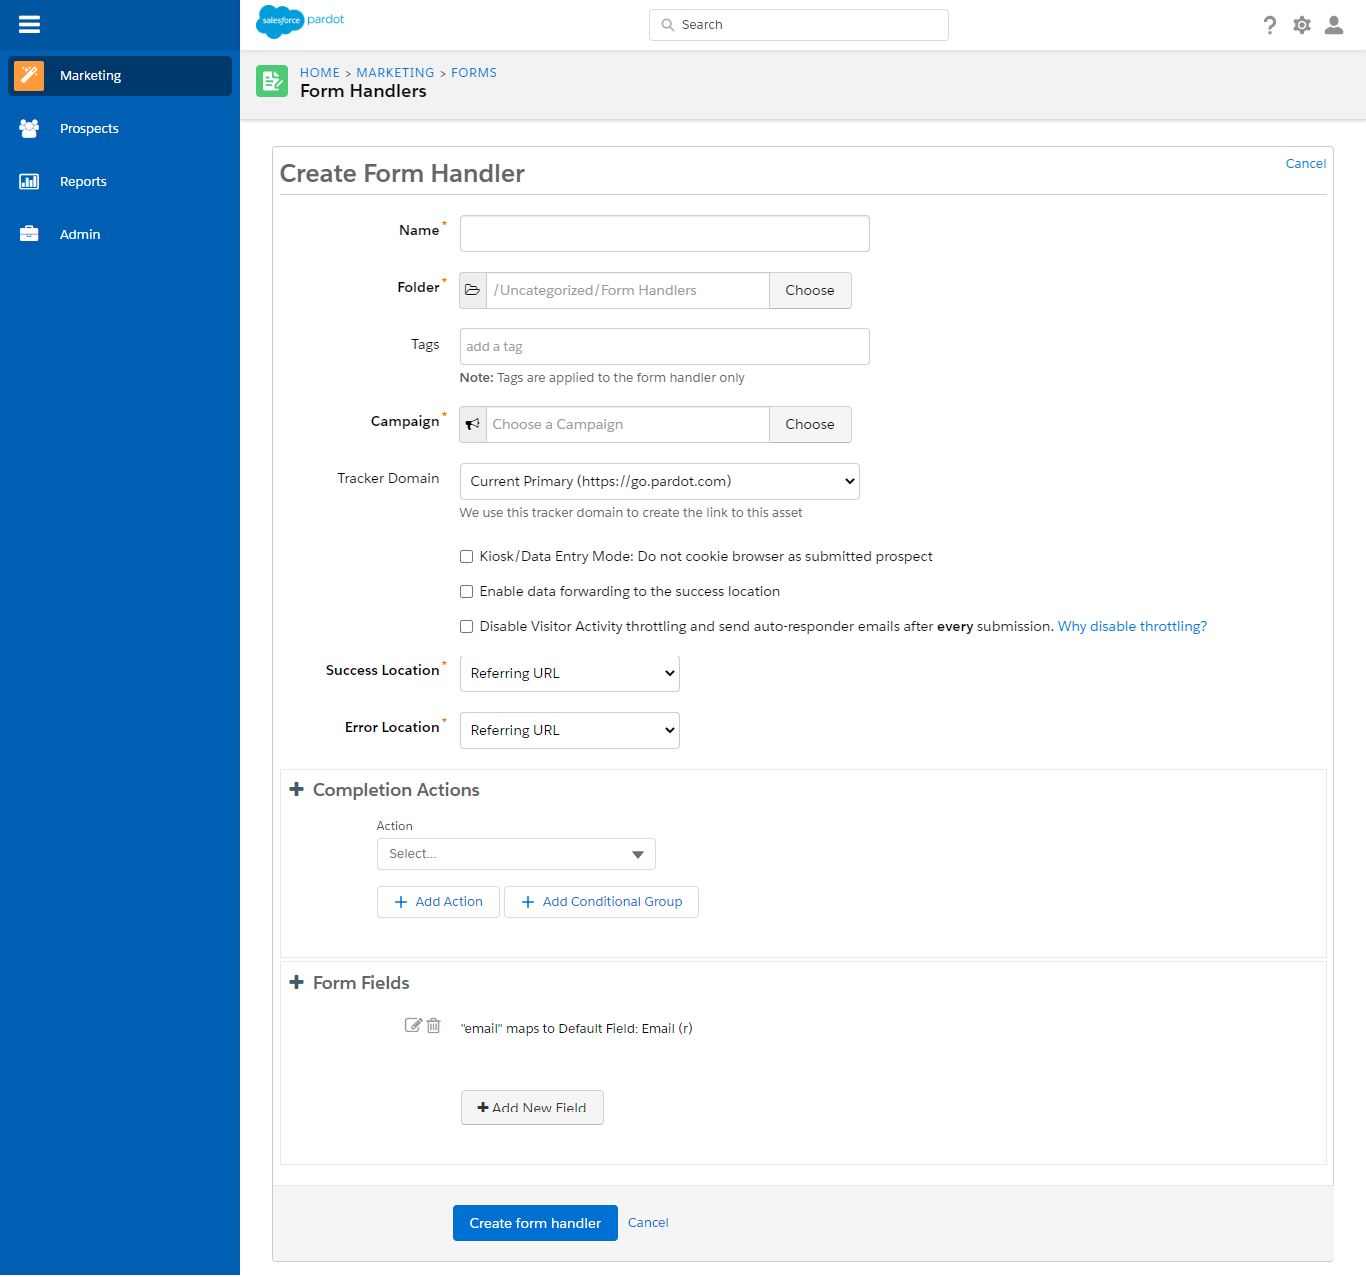
First, you need to create a new form handler in Pardot under Marketing > Forms > Form Handlers.
Add the needed Pardot required information in the form handler.
- Enter the form handler name
- Select a folder and add tags(if needed)
- Select your campaign
Do other custom settings:-
- Kiosk/Data Entry Mode: Do you want the prospect to be cookied when they fill out the form?
- Enable data forwarding to the success location: Do your data need to be submitted to another database other than Pardot?
- Disable Visitor Activity throttling: Do you want to disable Pardot’s spam protection and generate a distinct visitor activity and auto-responder email for all form handler submissions?
- Success & Error Location: Choose an Error page and a Thank you page URL.
- Completion Actions: Add actions that should happen when a prospect fills out the form.
In the image, you can see the basic information that needs to be added
Add the fields you want on the form:
Add the fields you want to capture through your Pardot form handler.
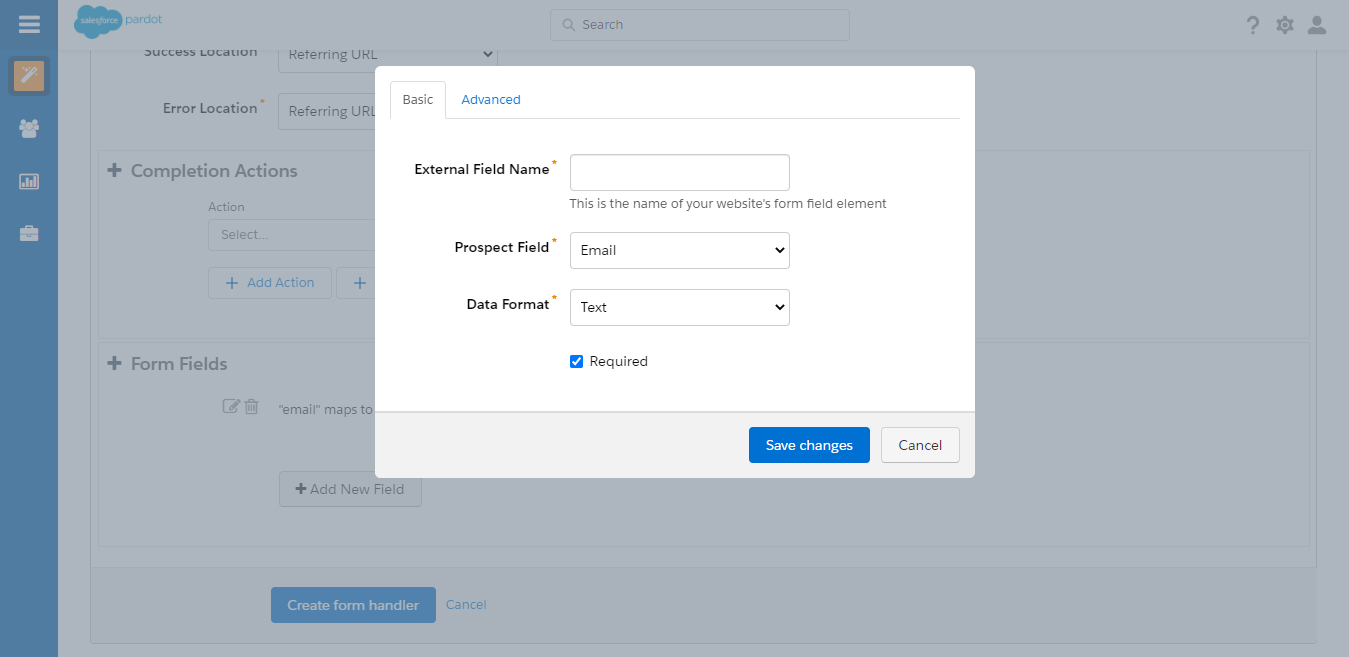
Note: Name the external field name the same as your prospect field name, but without the spaces, to avoid mapping issues while passing the information to Pardot.
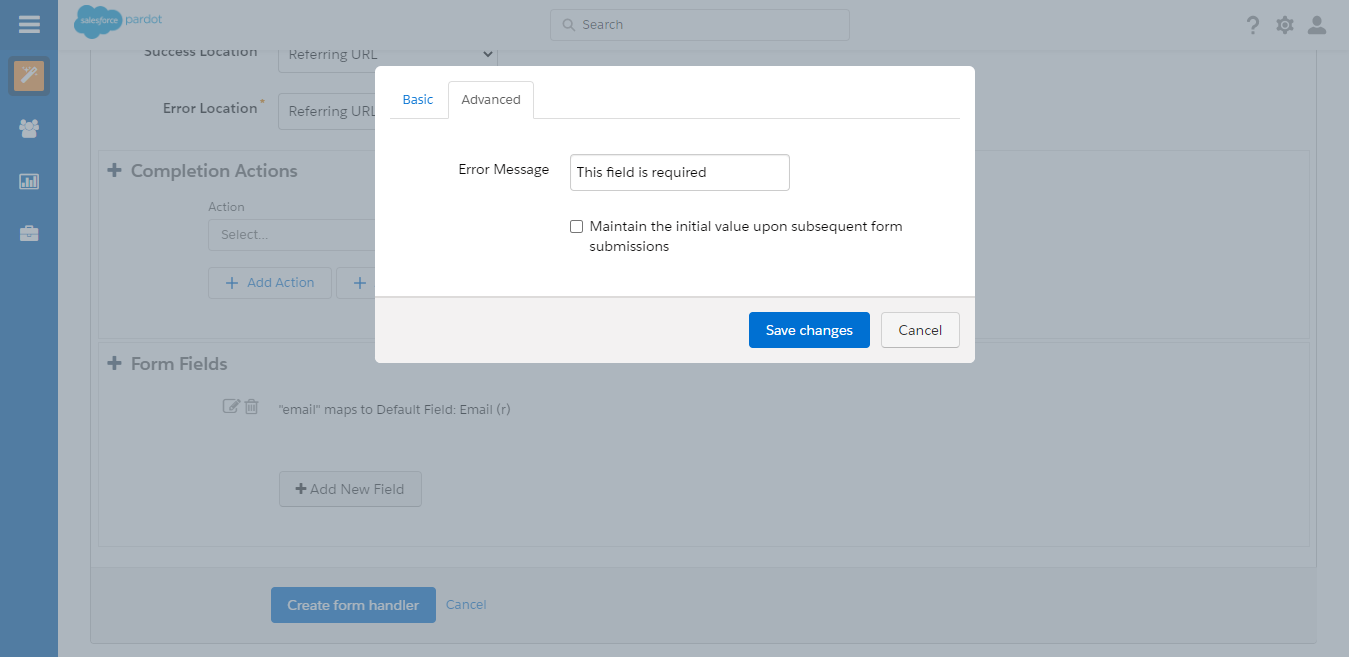
You can add custom error message text under the advanced tab.
Step2:-
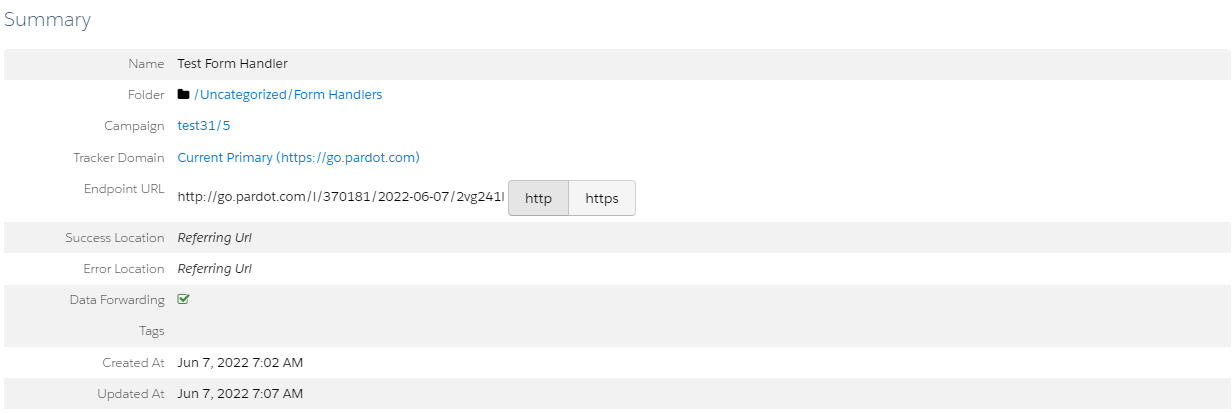
Now you need to create a simple form with HTML code to embed it on your website and for that, you need to Copy the endpoint URL.
Navigate to your Pardot form handler summary page and copy the endpoint URL.
Basic HTML structure:-
Below is the basic structure to create a Pardot form using a Pardot form handler.
- Action: This must be the endpoint URL of your Pardot form handler.
- Method: Must be POST
- Input: Add all the form fields you mapped while creating your Pardot form handler.
- Name: This must be the same as the external field name you specified while adding the fields in the Pardot form handler.
- Type: Specify the type (text, email, etc) as per the requirement.
You can add your styling/structure that matches your website.
Testing the Form Handler:-
If your data is not passing into Pardot through the form handler you added? So you can try some troubleshooting steps below to solve the issue:
- Firstly try to submit the form with just the email address required. If the prospect is created in Pardot without any issues, you might have a field type or a field mapping incorrect within your form handler.
- Try checking or unchecking the option for “Enable data forwarding to the success location” within your Pardot form handler settings. Depending on how you are connecting your form handler to your web form, this may or may not need to be enabled.
- Confirm again your field names are correct in the HTML code. The external field name you set within your form handler needs to be the EXACT SAME as what is in your HTML. So check that the HTML code of your form fields is using the same name and remember.
- Use the HTTPS endpoint if your website is HTTPS. Using an HTTP endpoint for your form handler when your website is HTTPS will cause the browser to give security warnings. Update the form handler endpoint to HTTPS to resolve the issue.