Streamline Your Business: Integrate Salesforce & Google Drive
Companies are getting increasingly reliant on applications such as Salesforce.com and Google Drive. The ability to share information between these applications enables streamlining business processes.
We can integrate Google API’s with Salesforce by using the below steps.
Follow the below steps for the Integration of Salesforce and Google Drive:-
- Create an App in the Google Console
- Open the Google Drive console. Here is the link for the console:
- Select a project. If you don’t have any project, then create one.
- Select ENABLED APIS AND SERVICES
- Choose the needed API. For this enable “Google Drive API” and “Google Picker API”
- Go to the OAuth consent screen. Add the Application Name, add the Application Logo (if needed) & then select scope. Scope defines what type of access your app can guarantee.
- Create credentials, and choose for that OAuth client ID.
- Credentials are needed to connect our Google project with Salesforce.
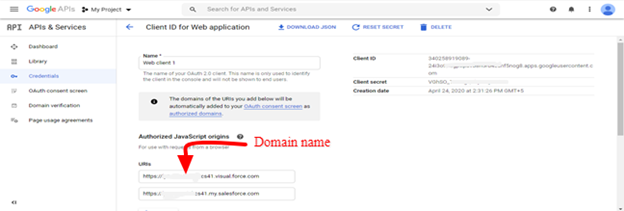
- Select Web Application, add some Name, and leave other fields blank. We don’t know Authorized redirect URLs yet.
- Then you should receive a client ID and client secret.

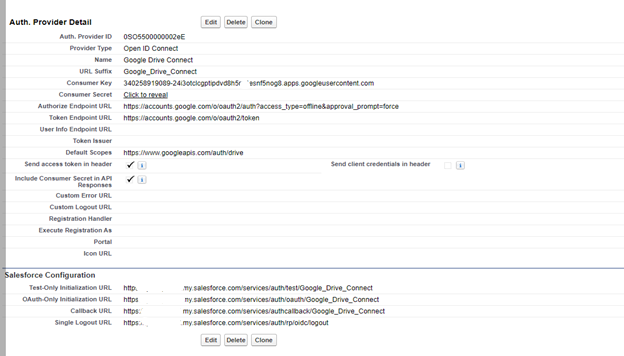
Configure Salesforce Auth. Provider:-
- In Salesforce go to Setup > Auth. Provider > New and select Open ID Connect
- Select Name, and paste Consumer Key and Consumer Secret. You can find it in Credentials > OAuth 2.0 client IDs.
- Add endpoints:
- Authorize Endpoint URL
https://accounts.google.com/o/oauth2/auth?access_type=offline&approval_prompt=force
Token Endpoint URL: https://accounts.google.com/o/oauth2/token
- Give a default Scope as https://www.googleapis.com/auth/drive
- After saving you can find the Callback URL in the Salesforce Configuration section. Copy the link and paste it into your credentials (Credentials > OAuth 2.0 client IDs).
- Remember: “Domain must be added to the authorized domains list before submitting.”
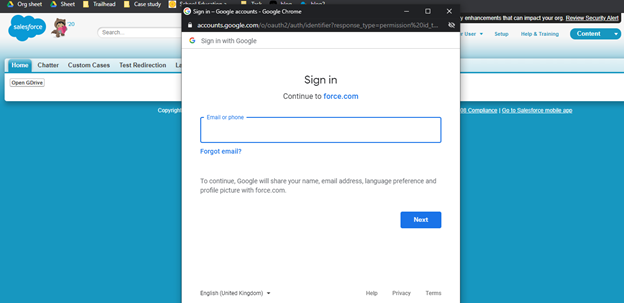
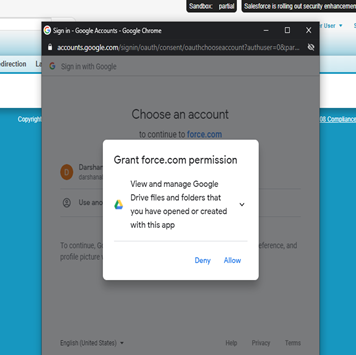
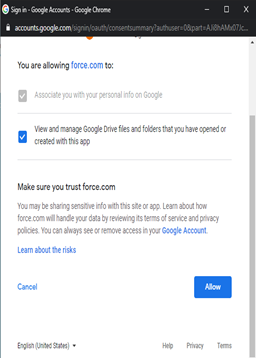
- Test your connection. Open Test-Only Initialization URL and OAuth-Only Initialization URL.
Go to Setup > Remote Site Settings > New Remote Site
Add Remote Site Setting:
Fulfil fields, as Remote Site URL use: https://www.googleapis.com
Create A New Visualforce Page:
<apex:page showHeader=”true” sidebar=”false” standardStylesheets=”false” docType=”html-5.0″>
<script type=”text/javascript”>
// The Browser API key is obtained from the Google API Console.
// Replace with your own Browser API key, or your own key.
var developerKey = ‘AIzaSyCBPNCs3tdQePgF0zUac4ua3bhCDD9-Byg’;
// The Client ID was obtained from the Google API Console. Replace with your own Client ID.
var clientId = “340258919089-24i3olodcgptipdvd8h5ru4esnf5nog8.apps.googleusercontent.com”
// Replace with your own project number from console.developers.google.com.
// See “Project number” under “IAM & Admin” > “Settings”
var appId = “340258911289”;
// Scope to use to access user’s Drive items.
var scope = [‘https://www.googleapis.com/auth/drive.file’];
var pickerApiLoaded = false, oauthToken, loadAuth=false;
// Use the Google API Loader script to load the Google.picker script.
function loadPicker() {
gapi.load(‘auth’, {‘callback’: onAuthApiLoad});
gapi.load(‘picker’, {‘callback’: onPickerApiLoad});
}
function onAuthApiLoad() {
if(loadAuth==true) {
window.gapi.auth.authorize(
{
‘client_id’: clientId,
‘scope’: scope,
‘immediate’: false
},
handleAuthResult);
}
}
function onPickerApiLoad() {
pickerApiLoaded = true;
createPicker();
}
function handleAuthResult(authResult) {
if (authResult && !authResult.error) {
oauthToken = authResult.access_token;
createPicker();
}
}
// Create and render a Picker object for searching images.
function createPicker() {
if (pickerApiLoaded && oauthToken) {
var picker = new google.picker.PickerBuilder()
.enableFeature(google.picker.Feature.NAV_HIDDEN)
.enableFeature(google.picker.Feature.MULTISELECT_ENABLED)
.enableFeature(google.picker.Feature.SUPPORT_DRIVES)
.setAppId(appId)
.setOAuthToken(oauthToken)
.addView(new google.picker.DocsView(google.picker.ViewId.DOCS).setIncludeFolders(true).setSelectFolderEnabled(true))
.setDeveloperKey(developerKey)
.setCallback(pickerCallback)
.build();
picker.setVisible(true);
}
}
// A simple callback implementation.
function pickerCallback(data) {
if (data.action == google.picker.Action.PICKED) {
var fileId = data.docs[0].id;
}
if( data[google.picker.Response.ACTION] === google.picker.Action.PICKED ) {
var downloadUrl;
if( data.viewToken[0] === “upload” ) {
downloadUrl = data[google.picker.Response.DOCUMENTS][0].downloadUrl;
}
else {
downloadUrl = data[google.picker.Response.DOCUMENTS][0].url;
}
document.getElementById( “result” ).innerHTML = downloadUrl;
document.getElementById( “result” ).setAttribute( “href”, downloadUrl );
}
}
function uploadFiles() {
loadAuth = true;
onAuthApiLoad()
}
</script>
<a onclick=”uploadFiles()”>
<div class=”slds-text-heading_large”>Open GDrive</div>
</a>
<a id=”result” target=”_blank”></a>
<!– The Google API Loader script. –>
<script type=”text/javascript” src=”https://apis.google.com/js/api.js?onload=loadPicker”></script>
</apex:page>
Below Image Is The Preview Of The Visualforce Page:-