
OVERVIEW OF ACCOUNT ENGAGEMENT FORM HANDLER
What is an Account Engagement Form Handler?
Form handlers are an alternative to hosted forms that you create in Account Engagement. You can use a form handler to integrate the third-party or custom forms and track submitted data.
Form handlers allow you to manage forms yourself and post the data and activities to Account Engagement. You may want to consider using a server-side post instead of migrating before the Account Engagement era forms to Account Engagement. A server-side post occurs after the data has been captured by your existing form and forwards the captured data onwards to an Account Engagement Form Handler. With this mechanism, you can use your existing business processes intact without the need to migrate pre-account engagement era forms into Account Engagement.
To do set up, you have to create a Form Handler in Account Engagement to receive the fields that will be passed through your web form. Once the data is successfully forwarded to the Account Engagement Form Handler, the prospects are tracked by Account Engagement in a similar way as the information has been submitted directly through the Account Engagement Hosted Form.
Whether you use Form or Form Handlers, Prospects will be tracked by Account Engagement unless and until Prospects delete their browser cookie or enable the No Tracking feature in the browser feature.
How to use Form Handler:-
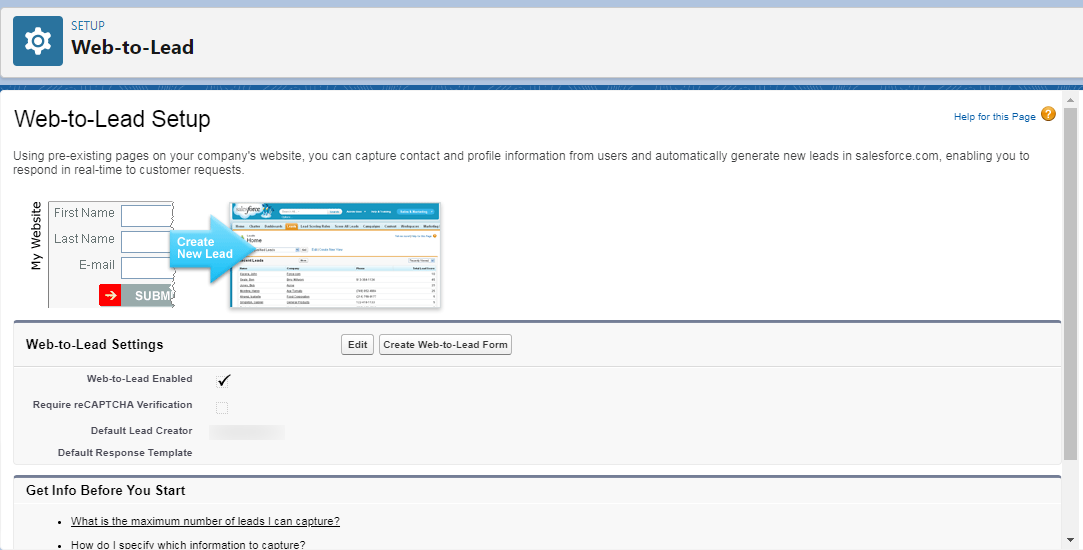
You can simply use any third-party form or create the new web-to-lead form in Salesforce to use it as a third-party form
Use Case Scenario to Use Form Handler:-
Suppose a business unit using the form to generate leads for their business and also they do not want to switch their existing web-to-lead forms to Forms hosted by Account Engagement even though Account Engagement Forms offer multiple features in comparison to a third-party form.
In such cases, we can suggest the use of an Account Engagement Form Handler. Also, the business unit wants to pass the prospect data to both Account Engagement and Salesforce, once a prospect submits the third-party web-to-lead form. And we will implement Form Handler by mapping their web-to-lead form.
Steps to implement the Form Handler:-
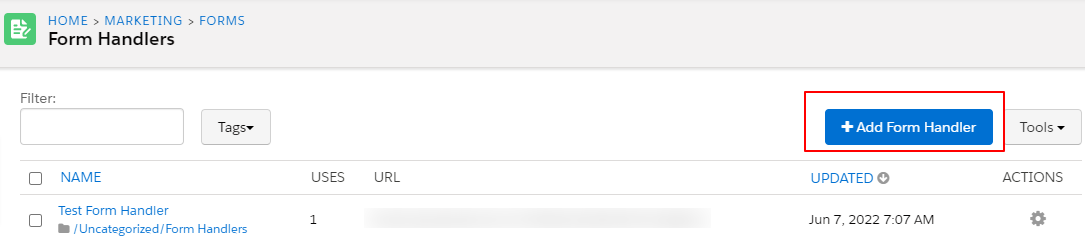
- Click on Marketing | Form | Form Handlers
- Then click on the + Add Form Handler button, as shown in the following screenshot:
- Enter the Name of the new Form Handler, and Fill up all the information if needed.
- Select a Folder wherever you want to save the form.
- Select the appropriate Campaign for your Form.
- Enable Kiosk/Data Entry Mode (Do not cookie browser as submitted prospect) if needed.
- Select Enable data forwarding to the success location check box, because we want to pass the same data to Salesforce. Once Account Engagement receives the post, the exact same data will be transferred to the location specified as the Success Location.
- The next step is to add a Success Location URL, to specify where you want to pass the data when a third-party form successfully submits data to Account Engagement; or, where you want to redirect the prospect information when data is successfully passed to Account Engagement by web-to-lead form. As we also want to pass the data to Salesforce, we have to identify Web-to-lead Post URL, as shown in the following screenshot:
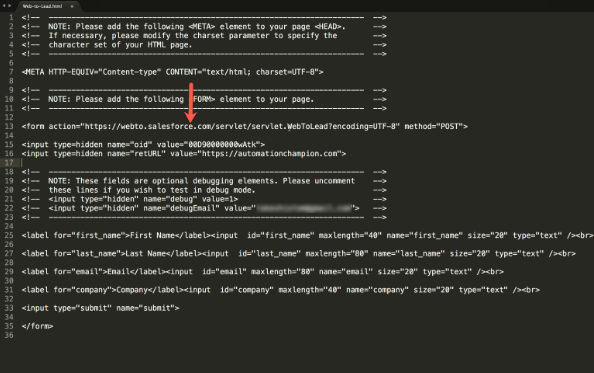
- Use the URL mentioned in the above screenshot in the Success Location.
- Now you can add Error Location, to specify what is displayed once a third-party form fails to pass the data to Account Engagement.
- In the next step define Completion Action, it allows you to take action as soon as the prospect data is successfully passed to Account Engagement. Completion Action will work overtime when a form is submitted by the prospect.
- In this step add fields to Form Handler and map it with web-to-lead form fields. Before going ahead, make sure the field names added in the form handler as an External Field Name should be the same as the field name in third party form for mapping purposes.
- While adding the fields in the form handler one open pop-up window will be shown, where you have to select Prospect Field from the dropdown. Once a prospect field is selected, the rest of the field Data Format will be auto-populated based on the information in the Prospect Field.
- Again for External Field Name make sure to enter the correct field name from the web-to-lead email field, as shown in the following screenshot:

- If you want you can add custom error message text under the Advanced tab. Once you are done with all the changes, Save the all work.
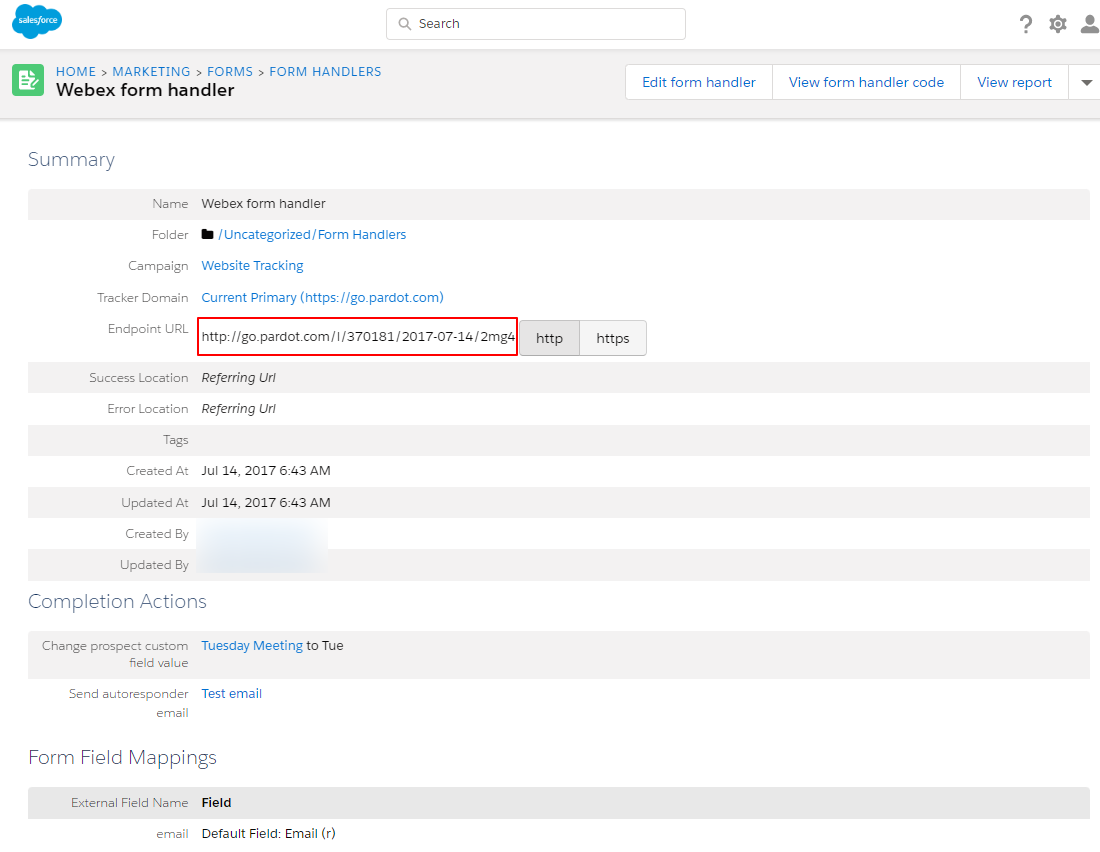
- The final step is to click on the Create form handler button. Your form handler is now live and hosted, as shown in the following screenshot:
- Now open your web-to-lead HTML form and add this URL to the form’s post URL and save the file with the “filename.html” extension.
Now you can do the testing of the form handler by accessing the HTML file and submitting the form by filling it up and then checking in account engagement and salesforce whether you got the data there.
Conclusion :
Account Engagement Form Handlers are a great marketing automation tool to use when you want to use your own forms rather than Account Engagement iFrame (forms created and managed entirely from Account Engagement).