Introduction
In today’s fast-paced business world, efficiency is key. Companies are constantly seeking ways to streamline their workflows, reduce manual effort, and improve productivity. Nintex, a leading process automation platform, enables organizations to optimize their business processes with ease. Whether you’re looking to automate document generation, approvals, or complex workflows, Nintex provides a seamless solution tailored to your needs.
Efficiency and automation are the lifeblood of any high-performing organization. Businesses today are constantly searching for ways to streamline operations, reduce manual efforts, and ensure compliance without sacrificing productivity. This is where Nintex, a leading process automation platform, comes in.
What is Nintex?
Nintex is a powerful process automation software designed to simplify and enhance business processes. It provides a low-code/no-code platform, making automation accessible to both technical and non-technical users. With Nintex, organizations can digitize workflows, optimize operations, and reduce manual effort, leading to increased efficiency and cost savings.
Products of Nintex
1. Workflow Automation:
Nintex Workflow Automation simplifies complex business processes by automating repetitive tasks, approvals, and notifications. It enables organizations to create workflows using a drag-and-drop interface, eliminating the need for coding. Workflows can be triggered by specific actions, such as form submissions or data updates, ensuring smooth process execution. The platform integrates with various applications like Salesforce, SharePoint, and Office 365, providing seamless connectivity across enterprise systems. By automating manual processes, businesses can reduce human error, improve efficiency, and enhance overall productivity.

2. Process Manager:
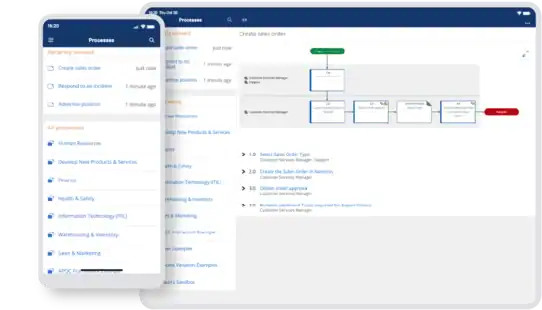
Nintex Process Manager (formerly Promapp) helps organizations map, document, and optimize their business processes. It provides a centralized platform where teams can collaborate on process improvements, ensuring transparency and compliance. With an intuitive visual interface, users can easily design workflows, assign responsibilities, and track progress. This tool is particularly useful for regulatory compliance, enabling businesses to maintain audit-ready documentation. Process Manager also offers built-in analytics to identify inefficiencies and optimize workflows for better performance.
3. Robotic Process Automation:
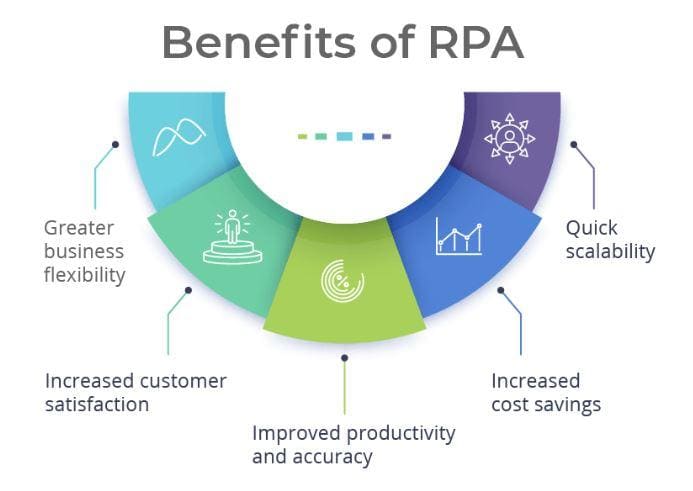
Nintex Robotic Process Automation (RPA) automates high-volume, rule-based tasks that traditionally require human intervention. It eliminates repetitive manual processes, such as data entry, report generation, and system integration, by deploying software bots. These bots can work across different applications, mimicking human interactions without modifying existing systems. Nintex RPA helps businesses reduce operational costs, improve accuracy, and free up employees to focus on more strategic tasks. It is widely used in finance, healthcare, and customer service industries for improving efficiency.
4. Document Generation:
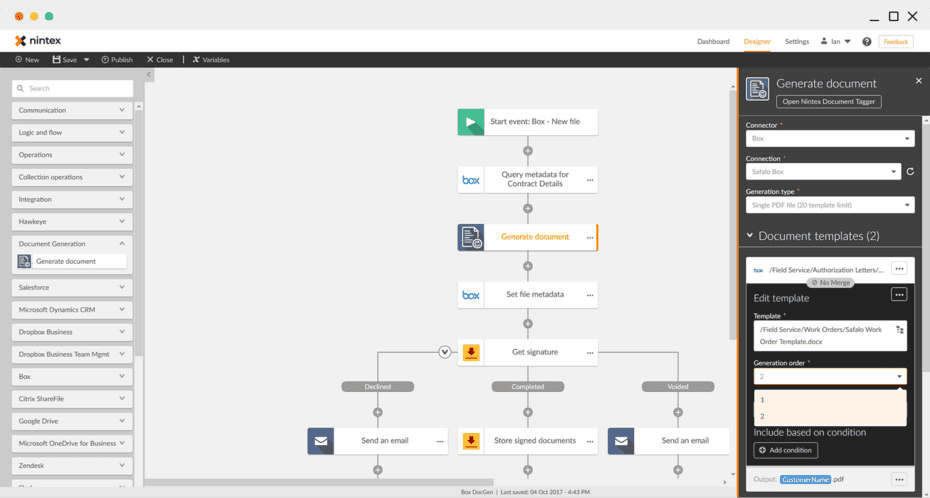
Nintex Document Generation (DocGen) automates the creation, formatting, and distribution of business documents like contracts, invoices, and reports. It integrates seamlessly with CRM and ERP systems, pulling data dynamically to generate personalized documents. With built-in templates and conditional logic, businesses can ensure accuracy and consistency in documentation. Nintex DocGen also supports digital signatures and workflow approvals, streamlining contract management processes. This solution reduces manual errors, saves time, and improves compliance with regulatory standards.

5. Form Automation:
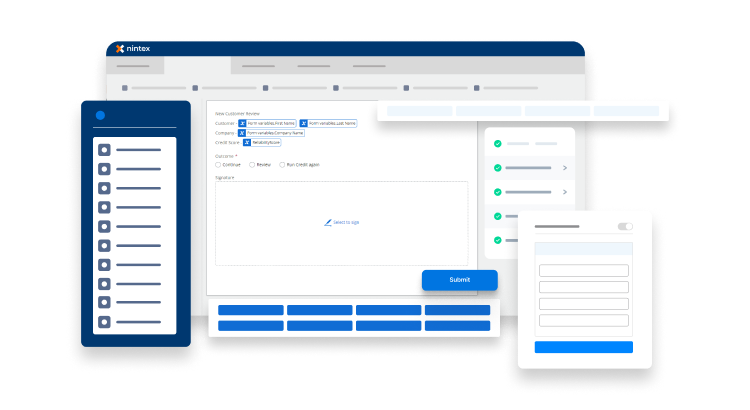
Nintex Form Automation allows organizations to create dynamic, mobile-friendly forms for data collection, approvals, and customer interactions. With an intuitive, no-code interface, users can design customized forms with conditional logic, validation rules, and integrations with enterprise applications. These forms can be used for HR onboarding, expense approvals, customer feedback, and more. Nintex Form Automation enhances user experience by making data entry seamless and reducing processing time. It also ensures data accuracy by validating inputs before submission.
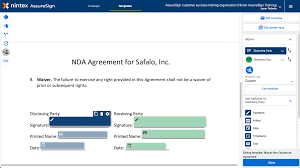
6. eSign:
Nintex eSign (AssureSign) is a secure electronic signature solution that enables businesses to collect legally binding digital signatures on documents. It integrates with Nintex Workflow, allowing users to automate signature requests as part of a broader business process. eSign ensures compliance with industry regulations like ESIGN and UETA, making it ideal for contracts, agreements, and approvals. The platform provides audit trails and multi-factor authentication for enhanced security. With Nintex eSign, organizations can eliminate paper-based approvals, speed up transactions, and improve customer experience.
Dashboard
The dashboard is the landing page that is displayed when you click on My Nintex. It provides a summary of the user’s most recent interactions. It displays the following information that is most important to the user in separate sections:
1. Overview:
The Nintex Dashboard is the main landing page when you access My Nintex. It provides a quick overview of your most recent interactions, helping you stay organized and manage tasks efficiently. The dashboard is divided into several sections:
- Active Tasks: Displays the 10 most recent tasks assigned to you.
- Latest Form Submissions: Shows the 5 most recent forms you have submitted.
- Favourite Forms: List up to 10 forms you have marked as favourites for quick access.
- Draft Forms: Displays forms you have saved but not yet submitted. Draft forms are automatically deleted 30 days after they are first saved.

2. Access the Dashboard:
Do one of the following to open the Dashboard page:
- Click My Nintex on the top navigation bar to open the dashboard.
- If you are already inside My Nintex, click Dashboard on the left menu.
i) Activity feed :
The Activity Feed provides detailed information about a task or form. When you click on a task or form from the dashboard, the activity feed opens on the right side of the screen, displaying essential details.
ii) View the activity feed for a task :
Open a task from the Dashboard to view the details of the task displayed on the activity feed. The task and the activity feed for the selected task are shown side by side as shown in the image below. The activity is displayed on the right and the task on the left.

The activity feed shows the following details of the task in separate sections:
Active task details: This section displays the status of the task, the name of the user the task is assigned to the time the task is initiated, and a Link to view the active task.
iii) To view the activity feed for the task :
1. Open the Dashboard page.
2. In the Active Tasks section, find the task that you want to view the details of and click on it. The task and the activity feed for the task is displayed.
iv) View the activity feed for a form :
Open a form from the Dashboard to view the details of the form displayed on the activity feed. The start form and the activity feed for the selected form are shown side by side as shown in the image below. The activity is displayed on the right and the start form on the left.

To check the details of a form:
- Open the Dashboard.
- In the Recent Form Submissions section, click on a form.
- The submitted form appears on the left, and the activity feed is displayed on the right.
The activity feed includes:
- Form Status (Submitted, Pending, Approved, etc.)
- User Who Submitted the Form
- Link to View or Hide the Form
- Pending Tasks Associated with the Form
- Task History
v) Resubmit A Form:
You can resubmit a form in My Nintex if needed. Only forms with Completed, Failed, or Terminated status can be resubmitted. If a form has multiple submissions, you can only resubmit the latest one.
How to Resubmit a Form:
- Open My Nintex and go to the Dashboard.
- In the Latest Form Submissions section, click on the form you want to resubmit.
- Click Show Form to open it.
- Click Form Submissions.
Once resubmitted, the activity feed will display details of both the original submitter and the user who resubmitted the form.
For more information about resubmitting workflows, see Resubmit workflows.
The form is resubmitted with the same data. After it’s resubmitted, the activity feed shows details of the original submitter as well as the user who resubmitted the form.
My Nintex Permissions
Each workflow in Nintex has unique My Nintex settings, which are managed by the workflow owner. These settings determine which users can view specific information from workflow executions. To access My Nintex, users must first have Participant access to the Nintex Automation Cloud tenant. Additionally, My Nintex settings allow workflow owners to modify permissions for workflow initiators and task assignees to control what information they can see and manage.
For detailed guidance on configuring My Nintex settings, refer to the My Nintex settings.
User Roles and Permissions
1. Business owner:
- View all workflow instances they own.
- See the start date and start form that initiated the workflow.
- Monitor and manage all tasks created within workflow instances.
- Ensure process transparency and track workflow progress efficiently.
2. Workflow initiator:
- View the instance of the workflow they initiated.
- Track the progress of tasks associated with that instance.
- Access permissions can be further refined through My Nintex settings to control task visibility.
3. Task assignees:
- Access to the workflow instance related to their task.
- Visibility into the start date and start form of the workflow instance.
- The ability to see and manage tasks assigned to them.
- My Nintex settings can also allow or restrict the delegation of tasks to other users.
By defining these permissions clearly, Nintex ensures that only the right individuals have access to workflow data, enhancing security and efficiency.
Workflows
Nintex Workflow Automation enables organizations to streamline and automate repeatable business tasks. Whether it’s document approvals, email notifications, or multi-step processes, Nintex Automation Cloud simplifies workflow creation using an intuitive drag-and-drop interface.
1. Create your Workflow:
Nintex Automation Cloud, you can create workflows using a user-friendly drag-and-drop designer. Every workflow consists of a start event and a series of workflow actions that define the process flow. These actions can interact with third-party applications using connections to ensure seamless integration across systems.
Workflow Start Events:
Workflow start events: Every workflow starts with a start event. You configure the start event to define when the workflow will start. Available start events are:
- Nintex – Component workflow: Start the workflow from another workflow.
- Nintex – Form: Start the workflow when a form is submitted.
- Nintex -Scheduled Start: Start the workflow at a scheduled time.
- Connector Event: Activates based on third-party app events (e.g., a new SharePoint list item).
Workflow Actions:
- Workflow actions: After you specify the start event of the workflow, add the actions to define what you want the workflow to do. Actions are the steps that the workflow performs to complete a process. If an action is a connector action, you must create a connection so the action can interact with a third-party application. For more information about creating connections, see Manage Connections.
For more information about creating a workflow, see Create a workflow.
2. Use Forms In Your Workflow:
Nintex allows users to build custom forms within workflows to collect data, trigger approvals, and facilitate user interactions. With an easy-to-use design canvas and drag-and-drop controls, users can customize forms to suit specific business needs.
- Forms can act as start events (e.g., an employee submits a request form to trigger a workflow).
- Forms can be embedded within workflows for task approvals and data collection.
3. Integrate Your Workflow With Third-Party Applications:
Nintex provides seamless integration with various third-party applications, enabling workflows to interact with external platforms. Workflows can:
- Trigger actions based on external events (e.g., start a workflow when a new Salesforce lead is created).
- Use connector actions to update data, move files, or generate documents in applications like Box, SharePoint, and Salesforce.
- Improve cross-platform automation by reducing manual data entry and ensuring synchronization between enterprise systems.
4. Use Variables in Your Workflow:
Variables in Nintex workflows store data dynamically and can be referenced or modified at various workflow stages. Variables can:
- Store user input from forms.
- Hold values generated by workflow actions (e.g., a calculated total in an approval workflow).
- Be updated throughout the workflow for advanced logic handling.
5. Session Expiry And Auto-Saving:
To maintain security, Nintex sessions expire after two hours of inactivity or when the browser is closed. Key features of session management include:
- A warning message is displayed 15 minutes before the session expiry, allowing users to extend their session.
- Auto-saving of unsaved workflow changes, ensuring work is not lost.
- If modifying an existing workflow, a new version is automatically created with a timestamped comment (e.g., “Auto-saved by Nintex”).
6. Access The Workflows Page:
- Click Automate in the top navigation bar.
- If inside the Automate menu, click Workflows on the left navigation panel.
- The Workflows Page will display all existing workflows, where users can edit, review, or create new workflows.
The Workflows page is displayed. For more information, see Workflow list.
Real-World Use Cases
1. Healthcare Compliance Automation:
- Challenge: A hospital needed to automate compliance reporting to meet HIPAA regulations.
- Solution: Implemented Nintex Workflow Cloud for automated compliance tracking and report generation.
- Results: Reduced compliance reporting time by 80% and improved audit readiness.
2. Financial Services Loan Processing:
- Challenge: A bank struggled with slow loan approval processes.
- Solution: Used Nintex RPA to automate customer data entry and approval workflows.
- Results: Reduced loan processing time from 7 days to 24 hours.
Conclusion
Nintex is a game-changer for organizations looking to optimize workflows, automate document generation, and enhance business efficiency. With its no-code platform, deep Salesforce integration, and powerful RPA capabilities, Nintex empowers businesses to focus on strategic growth rather than manual processes.
Next Steps:
- Start by Testing Nintex Workflow Cloud in a sandbox environment.
- Automate a simple approval workflow to see immediate benefits.
- Scale automation by integrating Nintex with Salesforce and ERP systems.
Embracing Nintex means unlocking the full potential of process automation—boosting productivity, reducing costs, and ensuring compliance with ease.
