Integration of Salesforce with Google AdWords
Introduction to Salesforce to Google Ads Integration:
- Salesforce and Google Ads are two tools that are a staple of any marketer’s technology stack.
- Google Ads provides the world’s largest advertising platform, being able to reach anyone with an internet connection, and Salesforce is the world’s most popular CRM system to track your prospects and customers.
- These two companies have created best-in-breed solutions, but if you are using both, you will know how hard it is to integrate the systems to produce the analytics you need.
- Without connecting the dots between your marketing and CRM data, you cannot fully optimize your campaigns. Let’s look into why this is important
Why Connect Salesforce to Google Ads?
- If you are using Salesforce & Google Ads, you will most likely be generating a portion of your leads through advertisements on Google.
- This will flow through to your website where a customer will fill in a form, which, if properly integrated, should appear in your Leads object in Salesforce.
- If you have this kind of setup, it’s already pretty slick, and you can effortlessly get customer inquiries for your product or service.
- But how do you understand which campaigns are the top performers? Which campaigns are bringing the most customers, and therefore where should you be spending your money? How do you see your ROI from Marketing spend?
- These answers are impossible to answer without connecting your Salesforce Lead & Opportunity data, with Google Ads.
Auto-Tagging :
- Auto-tagging is a required feature, which when used with Google Ads conversion tracking, allows you to see how effectively your ad clicks lead to valuable customer activity, such as website purchases, phone calls, app downloads, and more.
- Auto-tagging is turned off by default. To turn it on, follow the steps below.
- Sign in to your Google Ads account.
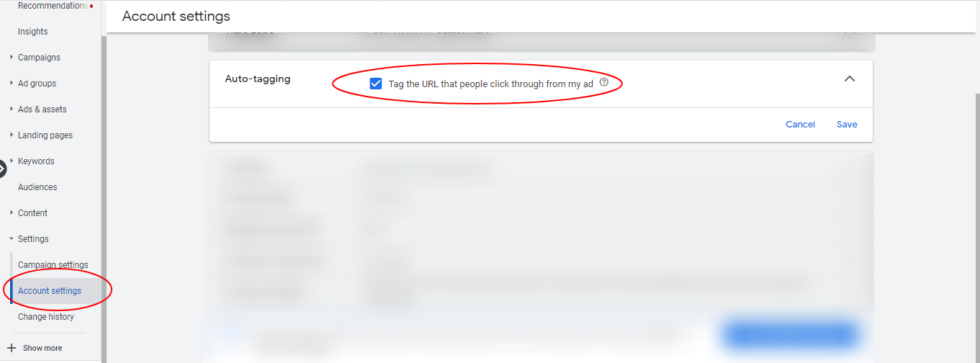
- In the left page menu, click Settings > Account Settings > Auto-tagging
- Check the box “Tag the URL that people click through from my ad” and Save
Steps to Integrate the Salesforce with Google Ads Account:
Step 1: Configure your Salesforce account
- Create a custom field with the Name “GCLID” on both the Lead and Opportunity objects and the length should be 255 characters.
- The field should be read-only to avoid unwanted changes.
- Field history tracking for the field “Stage” should be enabled.
- After that map the new field on Lead.GCLID field = Opportunity. GCLID.
Step 2: Do changes in your Salesforce web-to-lead form
The next step is to add the below code snippet to your Salesforce Lead form.
<script type=”text/javascript”>
function setCookie(name, value, days){
var date = new Date();
date.setTime(date.getTime() + (days*24*60*60*1000));
var expires = “; expires=” + date.toGMTString();
document.cookie = name + “=” + value + expires;
}
function getParam(p){
var match = RegExp(‘[?&]’ + p + ‘=([^&]*)’).exec(window.location.search);
return match &&decodeURIComponent(match[1].replace(/+/g, ‘ ‘));
}
var gclid = getParam(‘gclid’);
if(gclid){
var gclsrc = getParam(‘gclsrc’);
if(!gclsrc || gclsrc.indexOf(‘aw’) !== -1){
setCookie(‘gclid’, gclid, 90);
}
}
</script>
Step 3: Configure your Google Ads org.
Now, sign in to your Google Ads account and check if your Auto-Tagging is enabled. If it is not enabled, enable the “Tag the URL that people click through from my ad” and click save.
Then, click on the TOOLS & SETTINGS tab on the upper right and select Linked Accounts under the SETUP section.
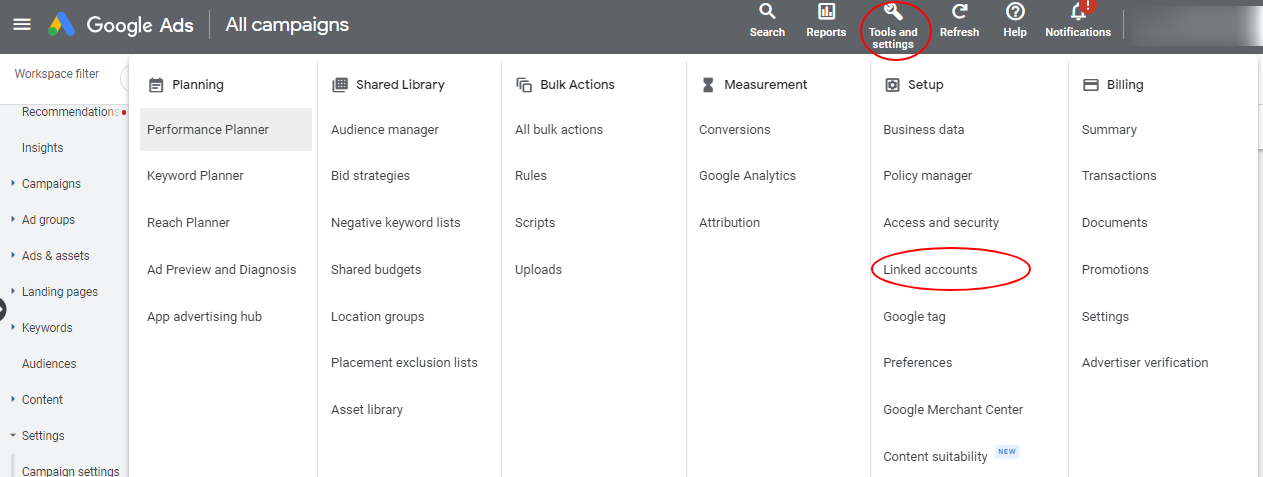
Select Salesforce by clicking on the DETAILS icon under Salesforce.
Step 4: Set up the salesforce for Google ads integration.
After clicking on details of the salesforce in the Google ads account you have to login into your salesforce account
Step 5: Test your site by passing the GCLID value in the URL parameter
You can test that the code added in your web-to-lead form is working properly by visiting your website and then adding the parameter ‘ ?gclid=”testgclid” ’ to the URL.
For eg: http://www.example.com?gclid=”testgclid”
Then fill out the form and submit it. after that you can check the newly created lead with the information you entered you can also see the GCLID field is having value you entered like GCLID=”testgclid”
Step 6: Setup the conversion Action
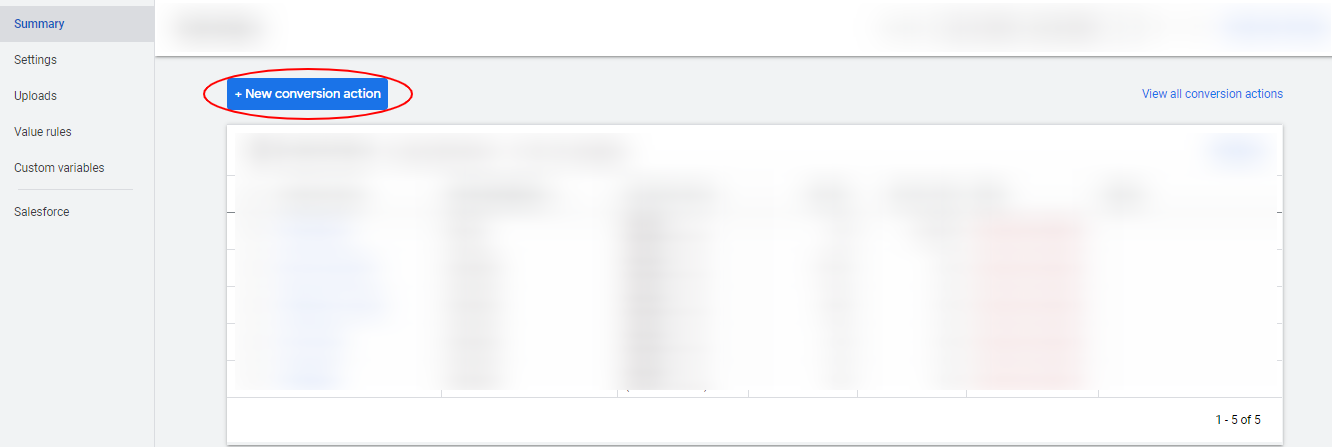
Go to your Google Ads account and click on the TOOLS & SETTINGS tab on the upper right and select Conversions under the MEASUREMENT section.
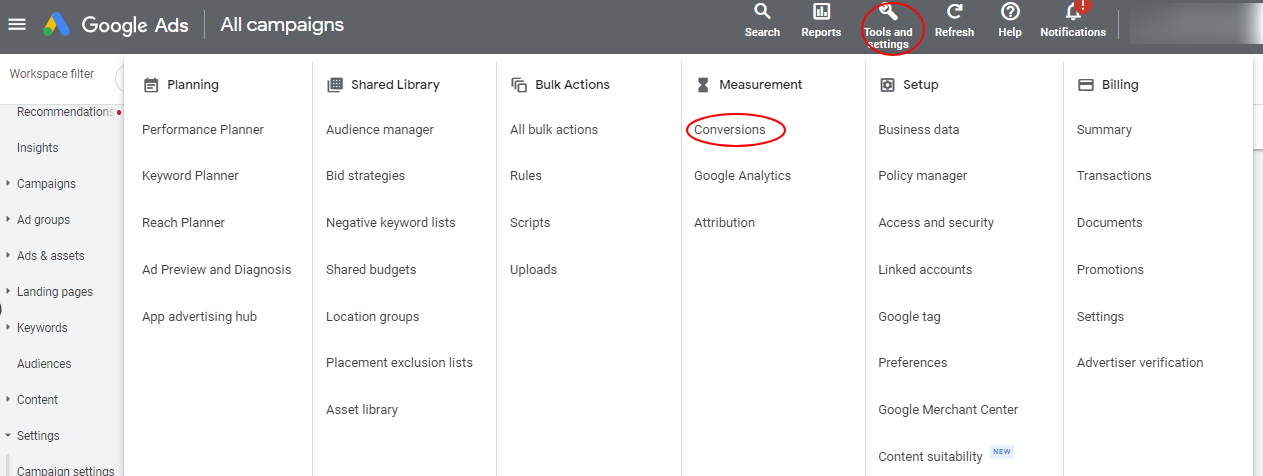
In the CONVERSIONS ACTIONS tab, click on the + (plus) icon.
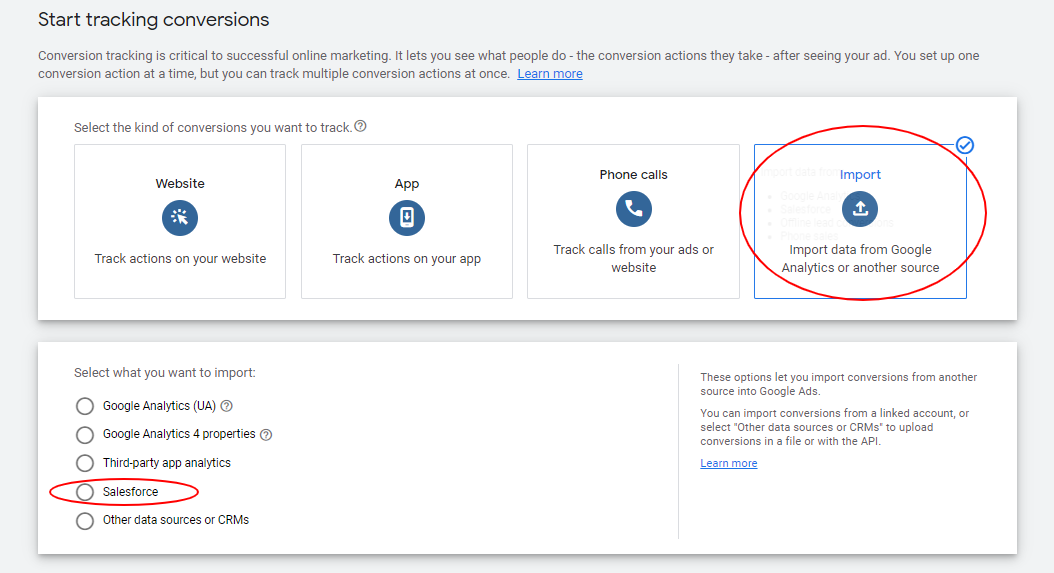
Select Import in the kind of conversions you want to track and check in Salesforce from the What you want to import tab.
The final step is to create a conversion, then set Value, Count, and Conversions as per your requirements and then click on CREATE AND CONTINUE.
How the GCLID Mechanism works:-
Once you are done with the setup of Google Ads Conversion Import for Salesforce, Below is the process of how it will work:
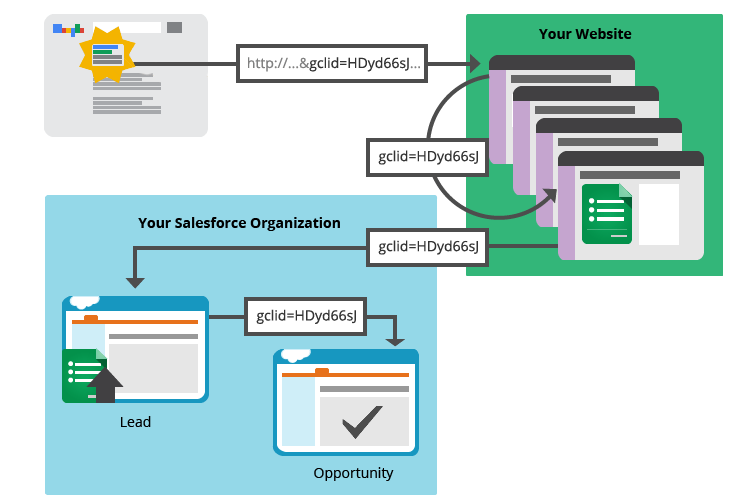
- Whenever someone clicks your ad and goes to your website, your website will capture a unique ID called a “Google click ID,” or “GCLID” and stores that ID in a cookie. Google Ads uses the same ID to find outs which click on which ad gets credit for any future conversions.
- Once the customer submits a lead form on your website, your website will pass GCLID along with the entered information to Salesforce and stores it in the corresponding lead and any future opportunities that are derived/created from this lead.
- Google Ads regularly checks your Salesforce account to see if you’ve recorded any new important milestones that came from ads. (In the setup process, you can pick which lead status and opportunity stage you want to track as conversions.) Google Ads will know if this milestone originated from a lead from an ad because if it did, it will have that unique ID that your website stored and passed along to Salesforce. If so, Google Ads will count that milestone as a Google Ads conversion.
