EXPLORING THE TOP 10 SALESFORCE LIGHTNING FEATURES
1. Lightning Snap-Ins
Snap-Ins is the most current element from Service Cloud Lightning. Developed with the help of Lightning Components, Snap-Ins enable organizations to rapidly coordinate client support directly into their applications and pages. This makes it simple to reach out to the clients adequately, right where they are.
The customer sees the chat widget button sits on your web page, and when someone has a question, they simply click the button to launch the chat.

Customers fill out the brief pre-chat form, which helps agents gather basic information about the customer, like their contact information and their needs.
Customers can chat while viewing your web page, and they can minimize the chat window whenever it’s in their way. The chat widget persists across your web pages so customers can keep browsing while chatting with an agent.
2. Assistant
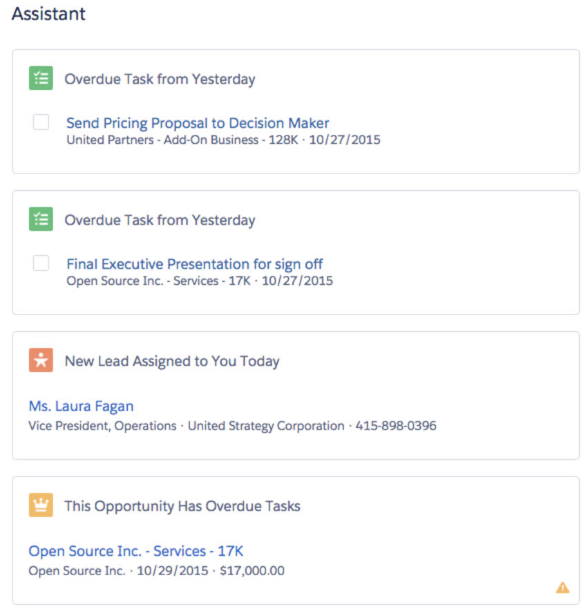
This great feature gives you a summarised to-do list based on ever-changing parameters with your records.
The Assistant shows your users things they need to address, including new leads and activities related to opportunities.
Items in the Assistant appear in the following order:
Leads assigned to you today
Opportunities with overdue tasks
Opportunities with no activity in 30 days
Opportunities with no open activity
Overdue opportunities
3. Path
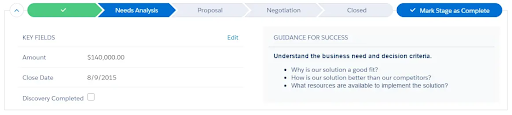
The path is a feature of Lightning that has been around since the dawn of its release. It enables Sales users to visualize their sales process for a particular record, as well as see helpful tips and fields.
The path is now enabled on a number of objects and is great at giving your reps that extra helping hand when progressing a deal. You can easily change the status by clicking on one of the chevrons, and you can update key fields at each stage. This is particularly great for a less experienced Sales team, getting them to focus on the fields that are important. From Setup, enter Path Settings in the Quick Find box, then select Path Settings. You can create a unique path for each record type for leads, opportunities, quotes, and custom objects.
4. Activity Timeline
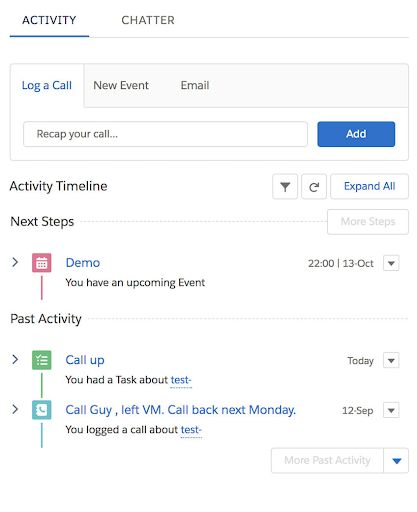
With the activity timeline, your sales reps can keep a finger on the pulse of their deals. The timeline tracks meetings, tasks, calls, and emails. Reps can see what they’ve done and what they still have left to do for each opportunity, lead, account, and contact.
The Activities timeline gives you a glimpse into the past and the future.You can view all the past tasks, activities, emails and events in chronological order of when they are due, which is highly beneficial for sales reps to get up to speed quickly. In addition to this, you can access the ‘Log a Call’, ‘New Event’ and ‘Email functions’ options which load inside the Component for ease.
When working with the activity timeline, keep the following in mind.
The configuration of page layouts and record types affects the tabs in the activity composer.
The activity timeline replaces the Open Activities and Activity History related lists.
You can customize the display and order of fields in the activity timeline.
The activity timeline icons aren’t customizable.
5. Kanban View
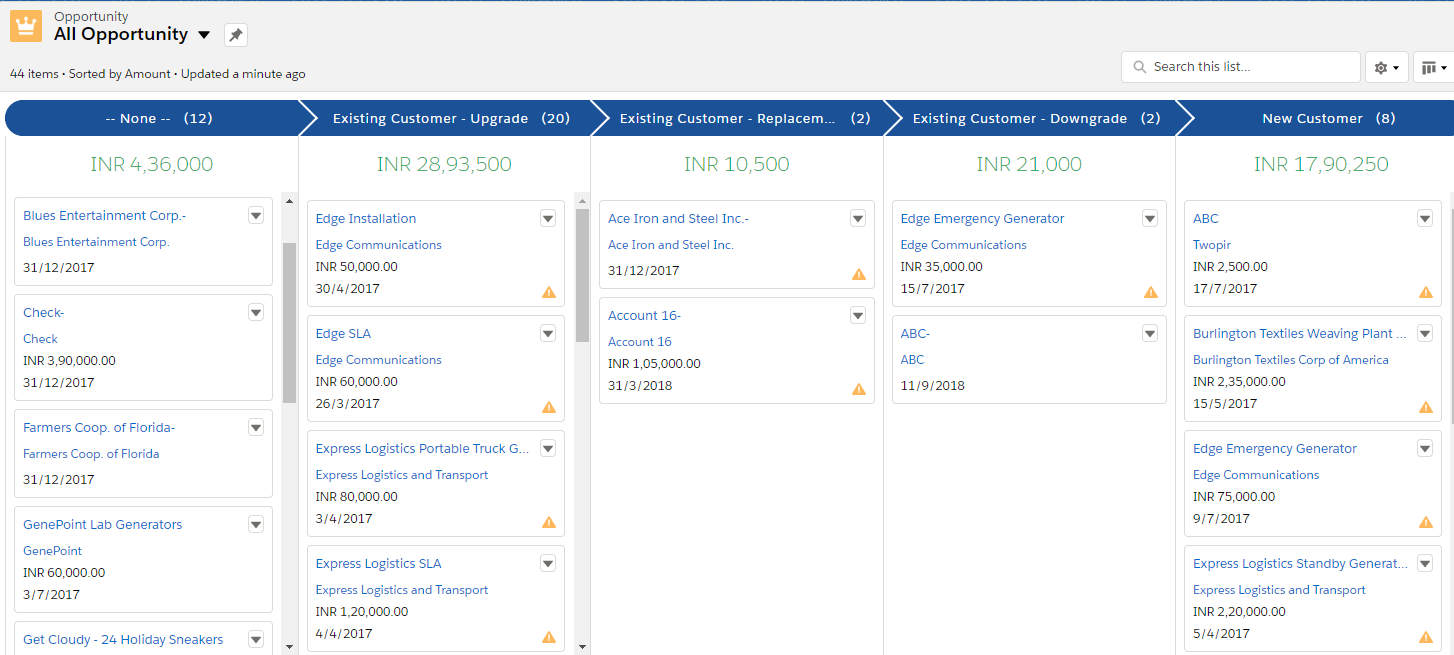
The Kanban view for Opportunities is a visual representation of all of a sales rep’s deals, organized by each stage in the pipeline. You can get to the Kanban view by selecting Kanban from the Displays menu on all list views except Recently Viewed.
Here, your users can manage their opportunities through all phases of the pipeline, dragging and dropping opportunities from one column to another. A yellow triangle on an opportunity card can indicate three types of alerts: overdue tasks, no open activities, or no activity for 30 days. Users can click the triangle to create tasks and events right from the card. Items on the board vary based on which list view is open.
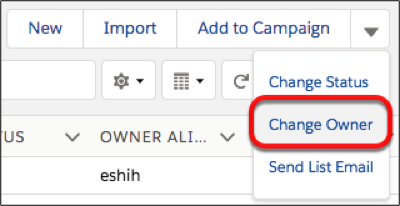
6. Assign a new owner to Multiple leads, Cases or Custom object at one time
Use the Change Owner page-level button to assign a new owner for up to 200 selected leads, cases, or custom objects. You can access the button in the page-level action menu in a list view or related list in standard table mode, or in Related List Quick Links.
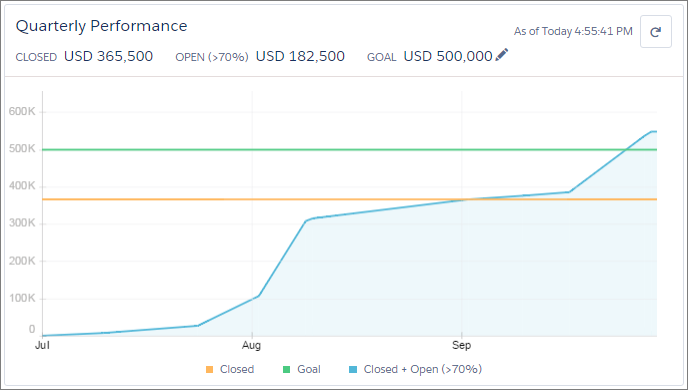
7. Performance Chart
Use the performance chart on the Home page in Lightning Experience to track your sales performance or the performance of your sales team against a customizable sales goal.
The performance chart displays data based on your sales team’s opportunities if you have an associated team. Otherwise, the chart displays opportunities you own. Only opportunities for the current sales quarter that are closed or open with a probability over 70% are displayed.
The performance chart isn’t refreshed automatically. Click to make sure you have the most up-to-date view of your sales performance.
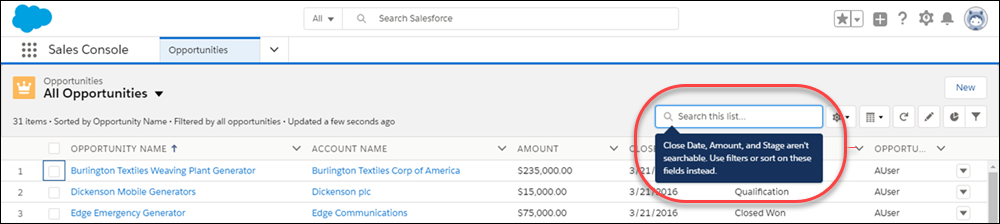
8. Search for ListView
Use the new search bar to search the field data in your list views and find the records you need in record time. The list view search bar appears next to the ListView Controls icon. Use the keyboard shortcut g+f to select the search bar. You can also add the search bar to the ListView component in Lightning App Builder. The search bar works across all applicable fields for all the records in the list, even if specific columns aren’t visible.
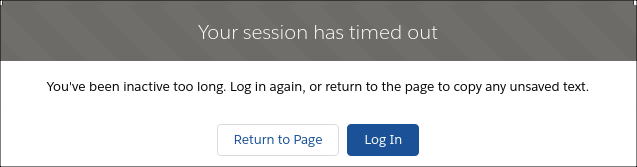
9. Recover your unsaved text after getting timed out
Sometimes Lightning Experience session is interrupted, whether you’ve been inactive too long or you lost your connection. You used to see the same timeout message, regardless of how your session ended. Now the message that pops up is specific to your scenario and tells you how to recover the unsaved text. If your session is interrupted, return to the page to copy unsaved text, like a Chatter post, so you don’t lose it during a new session.
10. See your Email Impact with Email Tracking
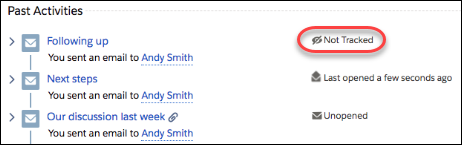
Get a 360-degree view of email activity and customer engagement. In the activity timeline and the email detail record, reps can quickly see if an email isn’t being tracked or when a tracked email was last opened. Tracking information is visible in the activity timeline.
Reps can see if an email is not tracked at all; when it was last opened, or if it is tracked but unopened.
If you want, add the First Opened and Last Opened fields to your email page layouts to see the information there, too. To collect and display email tracking information, you must enable Enhanced Email and Email Tracking. From Setup, enter Enhanced Email in the Quick Find box, then select Enhanced Email. Click Enable. From Setup, enter Activity Settings in the Quick Find box, and then select Enable Email Tracking.
Bounce back from email bounces:
Now reps know which lead, contact, or person account has a bad email address, and they know which specific email wasn’t delivered. A bounce warning appears next to the email address in the lead, contact, and person account record.